X-Type.uk - All about my Jaguar X-Type

IMPORTANT

The details in these pages are for informative purposes only. If you wish to attempt any of these projects yourself, you do so at your own risk. Whilst these pages provide information as to how I carried out the various projects (on my 2002 Model Year Petrol RHD X-Type) the same may not always be applicable to your vehicle.

If attempting to carry out any of the retrofits on my site, please remember that you do so at your own risk. Please ensure you know what you are doing as this is not a support site. The information is only provided from my own personal experience. If you require any advice concerning upgrades, or anything else Jaguar related, then www.jaguarforum.com is a great place to go.

X-Type.uk Projects

Fitting the Message Centre instrument panel

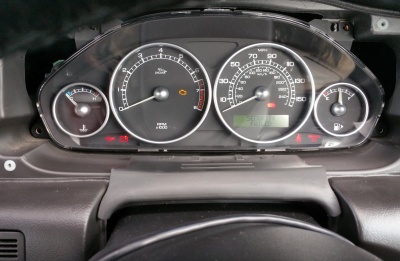
Old instrument panel, before replacement

If you have the standard instrument panel with the basic odometer and trip meter read out, you may think it would be quite nice to have the more informative message centre instrument panel, giving you additional information such as average fuel consumption, average speed, estimated range with current fuel, as well as A/B trip meters and the ability to switch between miles and kilometers. The Message Centre also introduces clear notifications of doors not closed fully, including boot and bonnet, and many other vehicle status messages.

See our 'X-Files' document Using the Message Centre for full details of its functions and how to use it.

Yes, this is achievable, but there are important considerations.

This is absolutely one of those projects where you need to know exactly what you are doing, and be comfortable with the operation of IDS/SDD and the Mongoose cable.

You have been warned.

 Parts needed:

  • Jaguar X-Type Message Centre Instrument Panel, Petrol or Diesel (to match your vehicle)
  • Replacement headlamp switch module, with A/B, RESET and ML/km buttons, and headlamp levelling (as per your current module)
  • Laptop configured with Jaguar IDS/SDD diagnostics and Mongoose cable

Important Considerations:

  1. The replacement Message Centre Instrument Panel must be of the same fuel type mainly due to the difference in engine RPM ranges of Petrol and Diesel
  2. You will need a minimum of two key fobs, and the current RF transducer settings are erased in the first step of reprogramming
  3. You will need Jaguar IDS/SDD software and a Mongoose cable to reprogram the new Instrument Panel and Keys
  4. Once you replace the Instrument Panel you will NOT be able to start the car until you have successfully completed the programming and you may not be able to go back to the old one
  5. Your recorded mileage will change - recommend taking a note (and photos) of your original mileage and the date of the change
  6. Ensure your car battery is fully charged and your laptop is charged and is on mains power. Also recommend you have a Smart Battery Charger connected to your vehicle too!

So, whilst this is quite an easy upgrade, it does have its pitfalls.

Remember, you will not be able to start the car once the new instrument panel has been fitted until you have successfully completed the repgrogramming, which is achieved using Jaguar IDS/SDD software and a Mongoose cable. It is recommended that you familiarise yourself with IDS/SDD before attempting this upgrade.

Step by Step:
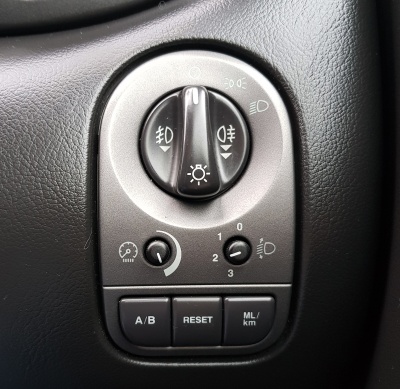
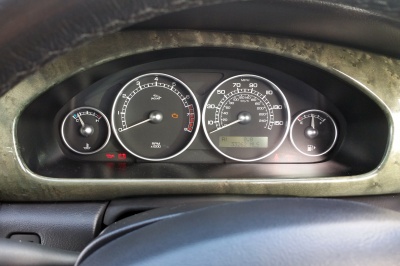
  1. Remove the old headlamp switch panel and replace with the new 'message centre' enabled panel
  2. Headlamp switch module with Message Centre controls
    Headlamp switch module with Message Centre controls
    Headlamp switch module with Message Centre controls
    Headlamp switch module with Message Centre controls
  3. Remove the dash trip around the instrument panel (held in place by clips so pull at the edges)
  4. Remove the old instrument panel, held in place by 4 screws and disconnect the 2 multipin plugs
  5. Fit the new instrument panel
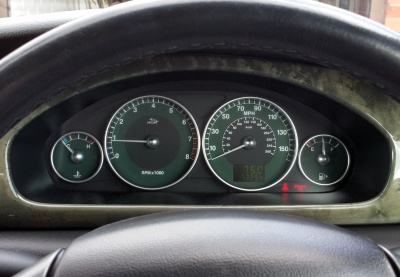
  6. New Message Centre instrument panel, before programming
    New Message Centre instrument panel, before programming
    New Message Centre instrument panel, before programming
    New Message Centre instrument panel, before programming
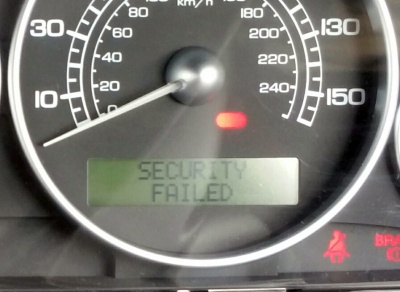
  7. Trying to start the car should result in the message "SECURITY FAILED" being displayed on the new instrument panel
  8. Time to re-program the new instrument panel
    Time to re-program the new instrument panel
    Time to re-program the new instrument panel
    Time to re-program the new instrument panel
  9. Using IDS/SDD and the Mongoose cable, navigate to the diagnostic screen and locate a fault on the instrument panel. Then at the bottom, select Continue. At the top select Extras. You should get an option to install a new Instrument Console.
  10. Select the Automatic Steup and swap the key fobs when prompted and follow all other on-screen instructions. This can take some time.
  11. Your new Message Centre Instrument Panel is programmed. Remember to disconnect the battery charger before attempting to start your car!

Message Centre programming completed. Note the mileage in this instance was that of the new cluster.

The new mileage reading will be either...

  • the reading from the new instrument panel, or
  • a reading somewhere between the old and the new

The mileage is recorded with the instrument panel and also stored within the ECU.

Note: It is illegal to sell a car without disclosing known mileage discrepancies, but it is not illegal to adjust a vehicle’s odometer mileage. https://www.autoexpress.co.uk/car-news/consumer-news/88547/car-clocking-is-mileage-correction-legal


This project is copyright © 2018-2024 X-Type.uk. All Rights Reserved.