X-Type.uk - All about my Jaguar X-Type

IMPORTANT

The details in these pages are for informative purposes only. If you wish to attempt any of these projects yourself, you do so at your own risk. Whilst these pages provide information as to how I carried out the various projects (on my 2002 Model Year Petrol RHD X-Type) the same may not always be applicable to your vehicle.

If attempting to carry out any of the retrofits on my site, please remember that you do so at your own risk. Please ensure you know what you are doing as this is not a support site. The information is only provided from my own personal experience. If you require any advice concerning upgrades, or anything else Jaguar related, then www.jaguarforum.com is a great place to go.

X-Type.uk Projects

How to retrofit Climate Control to an X-Type with Manual Aircon

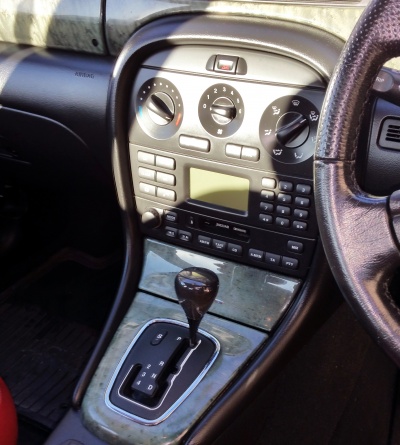
Before - with the original manual AC controls

Parts needed:

  • Replacement fan module (one with 4-pin connector), with connector and tails
  • Internal/Cabin temperature sensor, with front mounting and socket/tails
  • External ambient temperature sensor
  • Climate control panel (or remote climate control module RCCM, if fitting touchscreen)
  • Some short lengths of single core cable, and enough to run 2 cores from the radiator grill area through to the Climate Control panel/RCCM in the centre dash
  • The Electrical Guide for your X-Type - from our X-Files

Note:  If you are not planning to use the RCCM and fit a touchscreen/navigation unit, ensure you get the correct Climate Control Panel for your vehicle. If you have a heated windscreen then you will need to get the climate control panel with the front heated windscreen button. Even if you don't have a heated windscreen you can still fit the Climate Control Panel with the button. It won't do any harm and you could even fit a heated windscreen if you ever need to replace your windscreen, as you would then only need to install a relay in the engine bay fusebox and ensure 2 fuses are fitted and working.

Sunload Sensor: A solar (sunload) sensor is not required as this was removed in later revisions of the X-Type and deemed not to be necessary. There was even a Technical Service Bulletin (XT412-01) issue by Jaguar in March 2004 detailing the process of removing the sensor and cable-tying the wires out of the way in order to resolve a rattle. Omitting it now has absolutely no impact on the operation of the climate control system. The TSB states: "Removal of the sunload sensor does not reduce the functionality of the air conditioning or climate control systems. The vehicle is now in line with current X-TYPE production vehicles."

Internal/Cabin Temperature Sensor pin-out

The cable colours in the steps below refer to the harness to sensor socket wires. The colours change from the plug to the sensor.

Cabin Temp Sensor - Pin  Cabin Temp Sensor, Socket - Colour Cabin Temp Sensor, Plug - Colour RCCM 'White' Plug IP101, Pin
1 BLACK WHITE/GREEN 17
2 WHITE BROWN/GREEN 16
3 WHITE/RED PURPLE/BLACK 1
4 BLACK/WHITE BLACK 5


Step by Step:

  1. Disconnect battery - make sure you have your radio code, as you will need this to re-enable your radio later. Read about how to bypass radio code.
  2. You will need to remove the gear shift surround, ashtray, cd/radio, ac controls and glove box
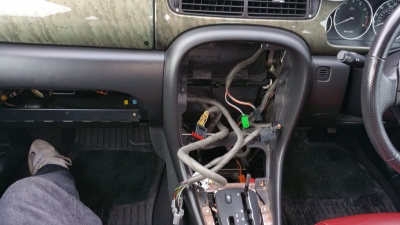
  3. Existing headunit and ac controls, ashtray, gear surround, glove box removed
    Existing headunit and ac controls, ashtray, gear surround, glove box removed
    Existing headunit and ac controls, ashtray, gear surround, glove box removed
    Existing headunit and ac controls, ashtray, gear surround, glove box removed
  4. Disconnect white and black plugs from rear of manual ac control panel
  5. Disconnect two grey plugs from centre back of manual ac control panel
  6. Disconnect plug from current fan unit and remove fan - located in passenger footwell (RHD)
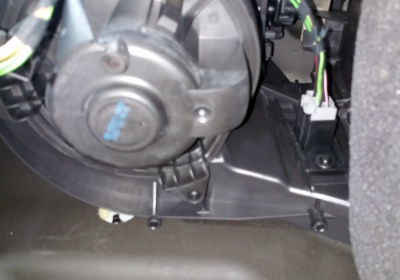
  7. Fan module, looking up
    Fan module, looking up
    Fan module, looking up
    Fan module, looking up
  8. Install new fan, using 3 screws
  9. Cut yellow/orange wire from old fan plug and connect to yellow/orange wire on new fan unit plug
  10. Cut green/black wire from old fan plug and connect to thick black wire on new fan plug
  11. Connect plug to new fan unit
  12. Locate thick green/black wire from the grey plugs removed from centre rear of the manual ac control panel and cut it, then locate and cut thick black wire from the other plug and connect these together
  13. Remove black/white wire (pin 7) from white plug from the rear of the manual ac control panel
  14. Fit black thin wire from new fan plug to white plug pin 6
  15. Fit black/white thin wire from new fan plug to white plug pin 7
  16. Fit black/white thin wire (pin 4) from internal temp sensor to white plug pin 5
  17. Fit white/red thin wire (pin 3) from internal temp sensor to white plug pin 1. This will already have an orange/red wire so splice into it.
  18. Fit white thin wire (pin 2) from internal temp sensor to white plug pin 16
  19. Fit black thin wire (pin 1) from internal temp sensor to white plug pin 17
  20. Fit internal temperature sensor in dashboard behind the small grill next to the steering wheel
  21. Connect external temp sensor to white plug pins 19 and 17
  22. The socket for the external ambient temp sensor will probably be pre-wired however it can be tricky locating the wiring from this behind the dash. The connections do actually terminate at the blue plug in the passenger fuse box (see note below) however I ran a pair of thin black wires from the socket at the front of the radiator grill and brought them through the large rubber grommet located near side in the engine bay which comes through behind the passenger footwell fuse box. Be careful to minimise the risk of water following the route of these wires into the cabin.
  23. Connect white and black plugs into the back of the new Climate Control panel (or the RCCM if fitting touchscreen)
  24. Testing that it works
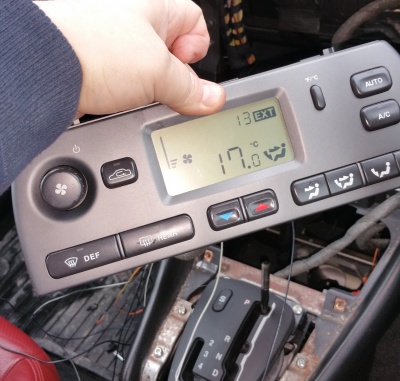
    Testing that it works
    Testing that it works
    Testing that it works
  25. Reconnect other connectors, eg radio, hazard lights, seat heaters. Tape up and tuck away any remaining unused connectors, eg. the old plugs from centre of manual ac controls.
  26. Reconnect battery

External ambient temperature sensor

The connections for the ambient temperature sensor can be accessed from the blue plug at bottom right of the passenger fuse box, pins 9 and 10. These connect to pins 19 and 17 respectively (although it doesn't matter which way round you connect these) on the white plug going into the climate control panel or RCCM.

Alternatively, you could run new cables through the rubber grommet from the engine bay that comes through behind the passenger (RHD) fusebox. If doing this you must ensure that you minimise the risk of water entering the passenger compartment.
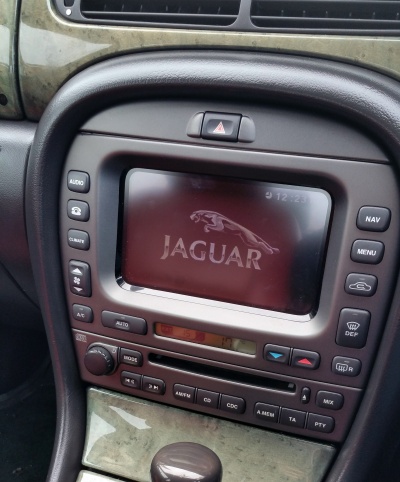
After - the Jaguar touchscreen. I didn't actually fit the climate control panel (that was just for testing). I then went straight on to fitting the touchscreen and navigation unit.

Project: Retrofit of Touchscreen and Jaguar Navigation System


This project is copyright © 2018-2024 X-Type.uk. All Rights Reserved.